How To: HDR in Aerial Real Estate Photography
Drone photography has revolutionized real estate marketing, offering breathtaking bird’s-eye views that capture the grandeur of properties. But even the most stunning aerial shot can benefit from HDR (High Dynamic Range) editing, taking your visuals to the next level. This guide dives deep into HDR techniques and best practices specifically for aerial real estate photography, helping you create captivating images that showcase properties in their finest light.

HDR in Real Estate Photography
Imagine stunning aerial shots where sunlight kisses rooftops, windows glimmer, and lush gardens burst with vibrant greens. That’s the magic of HDR in real estate photography. Simply put, HDR combines multiple exposures of the same scene, capturing details in both the brightest highlights and deepest shadows. This results in richer, more realistic images that amplify the property’s appeal and draw potential buyers in.
Aerial Photography in Real Estate
Aerial photography provides a unique perspective, showcasing the property’s size, layout, and surrounding area like no ground-level shot can. It allows potential buyers to envision themselves living there, picturing themselves enjoying backyard barbecues or relaxing by the pool. When combined with HDR, aerial shots become even more immersive and impactful, highlighting hidden details and adding depth and dimension to the scene.
Understanding HDR in Real Estate Photography
What is HDR and How Does it Work?
HDR stands for High Dynamic Range. It addresses the limitations of standard cameras, which often struggle to capture the full range of light and shadow in a scene. Traditional photos either lose details in highlights (blown-out whites) or shadows (crushed blacks). HDR overcomes this by capturing multiple exposures at different shutter speeds, one for the highlights, one for the midtones, and one for the shadows. These exposures are then merged through special software to create a single image that retains detail in all areas.
Advantages of Using HDR in Aerial Real Estate Photography
- Enhanced Detail and Clarity: HDR brings out hidden details in both highlights and shadows, revealing textures in architectural elements, the vibrant hues of landscaping, and even subtle details like window reflections.
- Increased Visual Appeal: Richer colors and deeper contrast create a more captivating and realistic image, drawing viewers into the scene and enhancing the property’s allure.
- Flexibility in Lighting Conditions: HDR works wonders in challenging lighting situations, such as harsh sunlight or overcast skies. By merging exposures, you can achieve a balanced image without sacrificing detail.
- Stand Out from the Competition: In a crowded market, HDR-enhanced aerial shots can make your listings stand out, grabbing attention and leaving a lasting impression on potential buyers.
Equipment and Software
Recommended Cameras and Drones for Aerial HDR Photography
For aerial HDR, camera sensors play a crucial role. Look for models with good dynamic range and low noise at higher ISOs. Some popular choices include the Sony A7R IV, DJI Mavic 3, and Autel Robotics EVO II Pro. When choosing a drone, prioritize stability and wind resistance, especially for HDR captures that require multiple shots.
HDR Editing Software and Tools
HDR editing software allows you to merge exposures, adjust tone mapping, and refine your final image. Popular options include Photomatix Pro, Lightroom, Photoshop, and Luminar AI. Some drone software even offers built-in HDR processing capabilities.
Capturing Aerial Photographs for HDR
Best Practices for Aerial Photography
- Use a tripod: Even with drones, wind can cause slight movement between shots. Using a landing pad helps minimize this, ensuring perfect alignment for seamless HDR merging.
- Bracket your exposures: Capture at least three shots at different shutter speeds: one for the highlights, one for the midtones, and one for the shadows. This provides the software with sufficient data to create a well-balanced HDR image.
- Maintain consistent settings: Keep settings like aperture and ISO constant throughout the bracketed shots to ensure consistent color and avoid unwanted artifacts.
- Shoot in RAW format: RAW files capture more data than JPEGs, providing greater flexibility for adjustments during editing.
Considerations for Lighting and Weather Conditions
- Avoid harsh midday sun: Ideally, capture aerial shots during golden hour or sunrise/sunset when the light is softer and more diffused.
- Watch out for clouds: Overcast skies can create flat, dull HDR images. Opt for clear or partially cloudy skies for optimal results.
HDR Editing Techniques
Step-by-Step Guide to HDR Editing
- Import your bracketed exposures into your chosen software.
- Merge the exposures using an HDR algorithm. Most software offers various presets and manual adjustments to fine-tune the merging process.
- Apply tone mapping. This crucial step determines how the merged HDR image is displayed. Adjust settings like contrast, saturation, and highlights/shadows to achieve the desired look.
- Refine details and remove artifacts. HDR merging can sometimes create ghosting or halo effects around high-contrast edges. Use tools like “deghosting” and “halo reduction” to clean up the image.
- Color correction and adjustments. Enhance the natural beauty of the landscape with subtle color adjustments, boosting greens in lawns or warming the tones of a wooden deck. Remember, the goal is to enhance reality, not create an oversaturated spectacle.
- Sharpening and noise reduction. Apply light sharpening to enhance details without introducing unwanted noise. For low-light drone shots, use noise reduction tools to smooth out any graininess.
Common Challenges and Solutions:
Dealing with Moving Objects:
Moving objects like cars or pedestrians can appear blurry or duplicated in HDR images. To minimize this, try capturing shorter exposure brackets or utilize software tools specifically designed for HDR with movement.
Addressing Overly Dramatic HDR Effects:
It’s easy to get carried away with HDR’s power, resulting in unnatural-looking images with exaggerated contrast and oversaturated colors. Always strive for a balance between showcasing the dynamic range and maintaining a realistic, appealing aesthetic.
Best Practices for Real Estate HDR Editing:
Achieving Natural and Appealing Results:
- Less is more: When it comes to HDR adjustments, a subtle hand often yields the best results. Avoid overdoing tone mapping or saturation, and focus on bringing out natural details and enhancing the property’s inherent beauty.
- Consider your audience: Remember, you’re trying to attract potential buyers, not win a photo editing competition. Keep the final image tasteful and inviting, avoiding overly stylized or gimmicky effects.
- Maintain consistency: Develop a personal HDR editing style that aligns with your overall brand aesthetic. This ensures a cohesive look for your portfolio and helps to set you apart from the competition.
Case Studies:
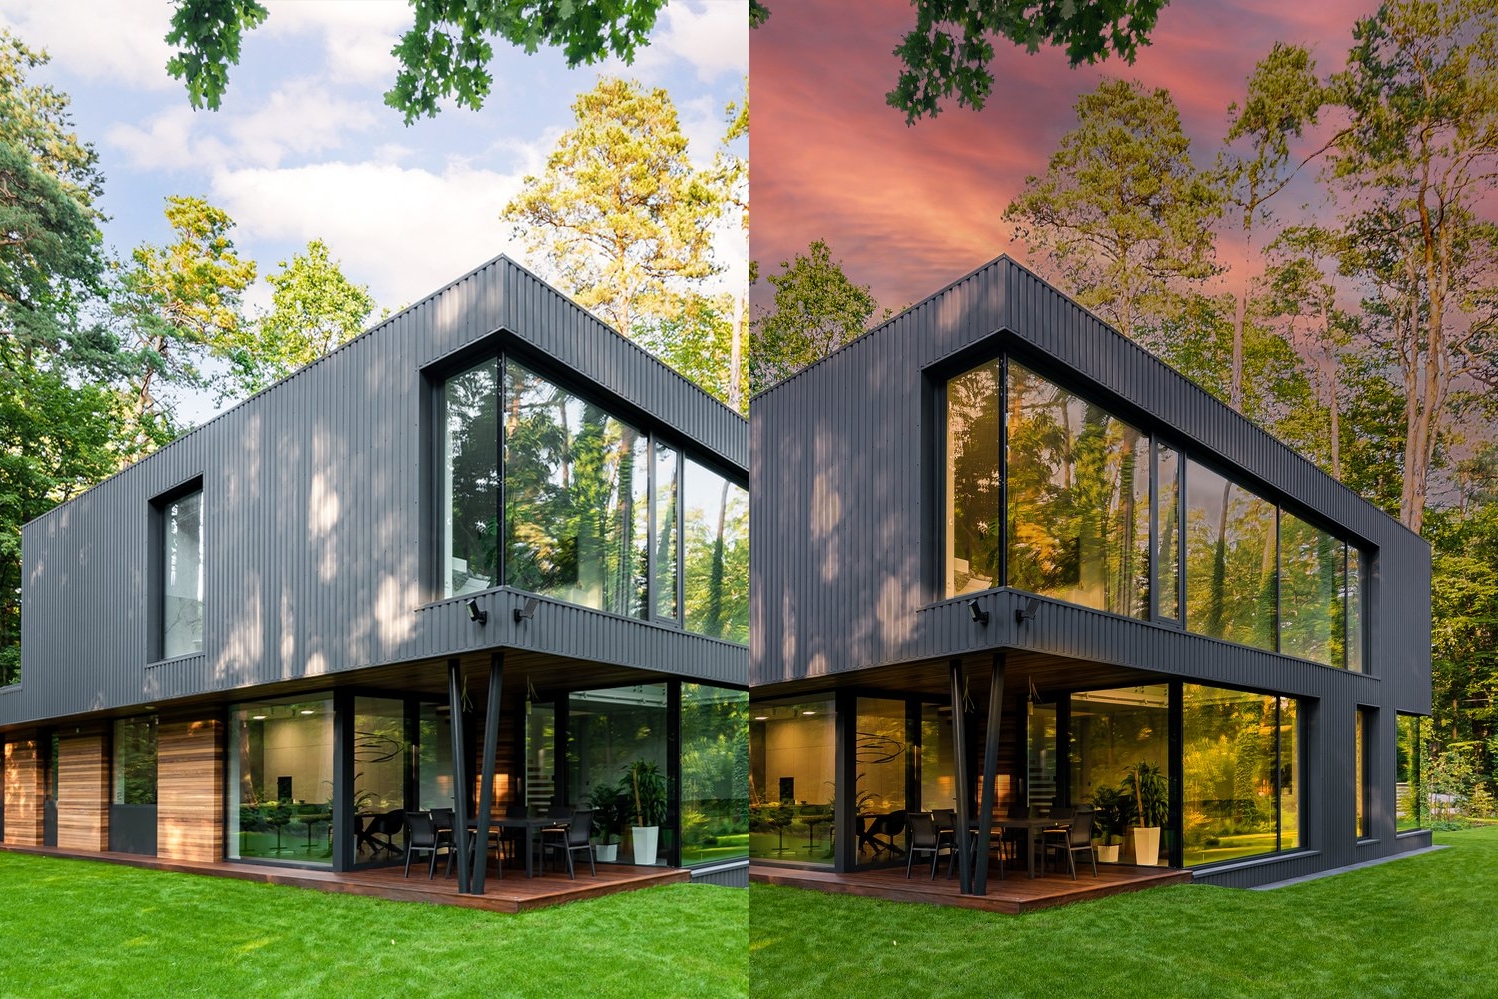
Before and After Examples of HDR Real Estate Editing:
Showcase the transformative power of HDR with compelling before-and-after comparisons. Highlight how HDR brings out details in shadows and highlights, adds depth and dimension to the scene, and ultimately, makes the property appear more captivating and desirable.
Tips for Efficient Workflow:
Streamlining the Editing Process:
- Preset Power: Many HDR editing software offers preset adjustments for different scenes and styles. These can be a great starting point and save you time, especially when batch editing multiple aerial shots.
- Batch Processing: Take advantage of batch processing features to edit multiple HDR images at once. This can significantly boost your efficiency, especially when dealing with large volumes of aerial photography.
- Keyboard Shortcuts: Master essential keyboard shortcuts for your chosen editing software. This allows you to work more quickly and navigate the editing process with ease.
Final Considerations
Keeping Up with Trends in HDR Real Estate Photography:
The realm of real estate photography is constantly evolving. Stay informed about emerging trends in HDR editing, such as the use of AI-powered tools and advanced tone mapping techniques. Experiment with new approaches while staying true to your own style, and don’t be afraid to push the boundaries of creativity.
Future Developments and Technologies:
HDR continues to evolve, with advancements in drone technology and software promising even more exciting possibilities for capturing and editing aerial real estate photography. Keep an eye out for innovations like HDR video capture with drones, real-time HDR processing capabilities, and AI-powered scene analysis for optimal HDR adjustments.
By mastering the techniques and best practices of HDR editing for aerial real estate photography, you can elevate your visuals to new heights, captivating potential buyers and showcasing properties in a way that truly sets them apart. Remember, HDR is a powerful tool, but it’s your creative vision and understanding of real estate aesthetics that will ultimately produce stunning images that drive results. Now go forth, take to the skies, and capture the magic of properties from a whole new perspective with the power of HDR!